Showing posts with label floral theme. Show all posts

Thursday, 7 September 2017

Dreaming Of A Pink Birthday

Anyone Dreaming Of A Pink Birthday? Well I am. A pink theme birthday party, which pink lover would say no to it.

I am supposed to focus on making Christmas cards, but somehow or rather I end up making more handmade birthday cards instead.

Dreaming Of A Pink Birthday


DREAMING OF A PINK BIRTHDAY

I made this card yesterday. I used a light green 14.5cm x 14.5cm card as base. Then I layered it with a rose pattern card taken from Vintage Colors Romance design pad from Craft Sensations. I cut the pattern card to a size 14cm x 14cm.

Next I cut the same shade of light green card, this time to a smaller size of 10cm x 10cm and layered it with with a striped pattern card from the same design pad. For the background of the Happy Birthday  die cut sentiment, again I used the same light green card which I embossed and cut into a scalloped circle shape.

Handmade Pink Birthday Card
Night Version
I stamped some pink flowers using Dreamees stamps (one of my favourite) and glued them at the corners with some die cut leaves. And for the final touch, I added some pink pearls to go along with the pink shade of patterned cards.

CRAFT CHALLENGES

Aud Sentiments - Challenge #188
Crafting With An Attitude - Challenge #31
The Paper Nest Dolls - Challenge #9
Inspiration Destination - Challenge #133
Unicorn Challenge Blog - Challenge #25
Penny's Paper-Crafty - Challenge #345
Tuesday Throwdown - Challenge #359


Sunday, 3 September 2017

Love In Rose Garden

Love In Rose Garden is another square handmade card with a floral theme. To be specific, a paper rose theme. With 'Lots of Love' as it's sentiment, this card is suitable not only for birthdays but also for anniversaries or just to tell someone how much they are loved.

Love In Rose Garden


I am not sure If I had mention it earlier, but a couple of weeks back I won some lovely digital stamps from Limited Runs for The Cute Fox Cub Christmas Card and also I won a giveaway from The Ribbon Girls Blog. I had this lovely gift below.


Love In Rose Garden
I used a pink 14 x 14 card as base and layered it with a 13 x 13 black card. I then layered a 12 x 12 pink shade polka dot card on top of the black card. I embossed and hand card two different sizes of scalloped circle, using the same pink and black card that I used as base. And I stamped a 'Lots Of Love' sentiment on it. This lovey sentiment stamp is from Dreamees.

I diecut some green leaves, 8 to be specific and also rolled some paper roses. 11 paper roses of two shades and two different sizes and assembled them together with the leaves.

To give this card a glamourous look, I added some sparkle /shiny stickers. Again using two different size to decorate my Love In Rose Garden card.


Until my next post...always Craft With Love

CRAFT CHALLENGES

If You Give A Crafter A Cookie -  Challenge #76
The Ribbon Girl Blog - September Card Challenge
Crafts Galore Encore Challenges - Anything Goes (September)
Pammie's Inky Pinkies - Challenge #1735
Digi Choosday - Week 35
Crafting By Designs - September Challenge
Simply Papercraft - Challenge #50

đź’–Karen Monicađź’–


Hugs And Birthday Wishes

Hugs And Birthday Wishes to every September baby especially to those celebrating their birthday today. I have not updated for more than two weeks.Was enjoying the SEA Games on TV but nothing can keep me away from crafting. I did complete a few projects  but the only thing is I couldn't find the time to update and share it here will all of you.

Now that the SEA Games are over with Malaysia being at the top of the medal tally with 145 gold medal (Yeayyyy) I am back my daily routine. It has been raining since last night but looks like Mr Sun is back at work now.  A long break over here. Everyone enjoying their long weekend with extra 3 days holiday.


HUGS AND BIRTHDAY WISHES

I am really excited to share this square Hugs And Birthday Wishes card that I made. Its the first time I am using this Dreamees stamp and I must confess that I fell in love with how clear the pattern comes out each time I stamped it. I must thank my Godmama for my first Dreamees stamp for my birthday present. I am a September baby too. It was and advance birthday present since my birthday is only on the 25 of September.

I used a white 14.5 x 14.5 card as base. I then layered it with a 13.5 x 13.5 patterned card from the Vintage Colors Romance pad from Craft Sensations. Using the same card, I stamped 5 flowers of 3 different sizes using Dreamees stamps set. I then diecut some green leaves from two different dies from M&C Boutique.


I then glued all the flowers and leaves on a border oval shape die cut pattern. I used some pearls for the center of the flowers and also some some art stickers for the corner of the card.  I stamped a Hugs, Kisses and Birthday Wishes sentiment at the middle of the card and added a tiny butterfly as the finishing touch.

Until my next update, Craft With Love.

CRAFT CHALLENGES

A Perfect Time To Craft - Challenge #09 (ATG)
Crafty Creations Challenge - Challenge #349 (ATG)
StarStampz - 2 or More Diecut Challenge
Creates And Makes - Challenge #14 (ATG)
Crafting With Friends - Challenge # 49 (ATG)
Crafty Sentiments Design - For Someone Special
Brown Sugar - Challenge #265 Trying Something New


đź’–Karen Monicađź’–

Wednesday, 9 August 2017

May Your Christmas Be Bright

Hello Craft Lovers,

Hope your day have been crafty and fun. Its raining heavily outside. Just my favourite weather to craft. I planned to make at least two christmas cards today. But before I sit and craft away, I better share with you the 2nd handmade Christmas card that I made a few days back.

May Your Christmas Be Bright

For this card, I used a white border card from Create and Craft. Then I layered it with a green emboss scalloped shaped frame using the Auspicious embossing board from Glitter Girls.

May Your Christmas Be Bright


Then on a red card I embossed a candle shape using the Christmas Impression board. I wanted this card to be simple, so I didn't pay much attention to the flame.

Handmade Poinsettia


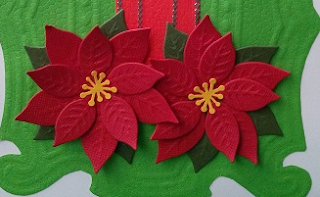
I die cut two sets of poinsettia flowers and glued it just below the candles and used some border stickers to highlight the candle.  And finally I used stickers for the Merry Christmas and Season's Greeting's sentiment.

That's all for today's card. Craft with love everyone

CRAFT CHALLENGES

The Paper Nest Dolls - Challenge #7
Lil Patch Of Crafty Friends - Challenge #63
Through The Craft Room Door - TTCRD 8th Aug
Digi Choosday - Week 32
A Snowflake Promise - Challenge #43
Ike's World - Challenge #94
Lemon Shortbread Challenge - Challenge #47

đź’–Karen Monicađź’–

Monday, 7 August 2017

The Cute Fox Cub Christmas Card

Like my The Cute Fox Cub Christmas Card? Looks like its Christmas in August for me. I finally started making my cards. But so far only made 3.

I named this first card The Cute Fox Cub, well that's the name of this cute digital stamp that I won from Fabrika Fantasy. In this article Basket Weave Card, I did mention about my win and decided to put it in good use.

The Cute Fox Cub Christmas Card


The Cute Fox Cub Christmas Card

I used a white card as base. Then using my Auspicious Embossing Board from The Glitter Girls, I embossed a flowing book shape which had stunning diamond frames and fancy corners on a red and green card and layered them with the base card.

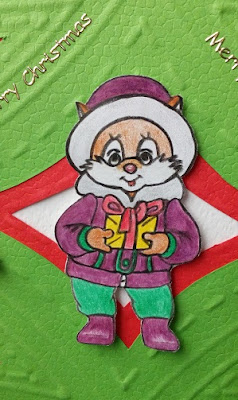
I then die cut two poinsettias and glued them at both sides. At the center, I glued the Cute Fox Cub digital stamp which I coloured using Faber Castell colour pencils.

Christmas digital stamp


To add some gold touch to the card, I used gold border stickers and gold sentiment stickers.

That's it, my first handmade Christmas card for 2017.

CRAFT CHALLENGES

If You Give A Crafter A Cookie - Cookie Challenge #74
Morgan's Artworld - Challenge #15
Addicted To Stamps - Challenge #253
Digi Choosday - Week #31
A Perfect Time To Craft - August Challenge
Simply Papercraft - Challenge #49
Colour Crazy Challenge - Week #31

Winner of If You Give A Crafter A Cookie - Cookie Challenge #74

đź’–Karen Monicađź’–

Wednesday, 2 August 2017

Basket Weave Card

My first ever Basket Weave Card and I am excited to share it here. I just made a simple one, since it was my first try. Was searching for something different and came across this basket weave, so at once gave it a try. Will try to find some time and share a tutorial with you.

August is here and so far I only made 1 christmas card. Yes only ONE. I am soooooo way behind. Need to start desperately soon. I have had a busy week and didn't have much time to sit at my craft table and get creative

Basket Weave Card


But there is a good news. I just received 3 beautiful digital stamps from Fabrika Fantasy for a challenge that I won at Scrapping4funchallenges blog. Its for my When A Butterfly Sees Flowers handmade card. I decided to choose all 3 christmassy digis so that I can have some unique and fun christmas cards.

Basket Weave Card

Back to my basket weave card, I used a light green card as base. That's the card that I used the basket weave technique on. It's actually very simple to make. I then layered the base card with pattern paper. And used gold border stickers for all four sides of the pattern paper. Using my spellbinder's Sapphire, I die cut a 'With Love' sentiment from a piece of black coloured cardstock.

how to weave a card


The paper roses are also die cut and hand rolled then I glued them on a stamped leave that was hand cut. To make the card look more presentable, I added a few purple pearl embellishment.

In my next post I will be sharing with you my first handmade christmas card for 2017. Hopefully can share it by tomorrow. Until then, Craft With Love


CRAFT CHALLENGES

Come And Get It - Just Add Flowers
Crafting With Friends - Challenge #48
Crafty Sentiments Design - Anything Goes
Through The Craft Room Door - ATG (Aug 1-7)
Little Miss Muffet - Challenge #168
Through The Purple Haze  - Challenge #130
Crafty Creations Challenge - Challenge #347
đź’–Karen Monicađź’–


Sunday, 23 July 2017

As Simple As Can Be

Happy Sunday Craft Lovers,

I made another birthday card and this time my theme is As Simple As Can Be. Once again I combined red, white and blue. I seem to like this three colors combination, though I must start using my orange cardstock, they are really starting to pile up.

What are you plans for the weekend? Any craft projects in mind?

handmade birthday card


Since its already going to be the end of July, I really need to start getting into the christmas card making mood. I got loads of cards to make, If I don't start now I will be ending up buying again like last year.

As Simple As Can Be

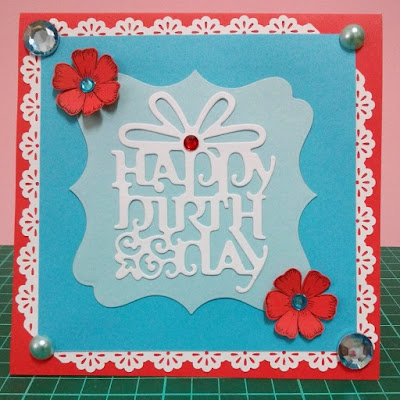
For this simple handmade birthday card, I used a red card as base then I layered it with a white card. I used a flower doily border punch from DoCrafts to punch the white colored card. Oh yes once again this is a 5.5" x 5.5" card. Then I used a blue card as the final layer. For the background of my sentiment I die cut a lighter color blue shade card.

For the added touch I stamped two red flowers and die cut using my Spellbinder's Sapphire. I also used some blue embellishment and blue pearls for the four corners and for the center of the two red flowers.

red, white and blue handmade card

Until my next post which will be of a different theme...continue to Craft With Love.

CRAFT CHALLENGES

Digistamps4Joy - Challenge #138
Get Creative Challenges -  Challenge #60
Love To Scrap Challenge - Challenge #99
Let's Craft and Create - Challenge #127
Crafty Sentiments Design - Clean and Simple
Colour Crazy Craft - Week 29
Crea Chicky - Challenge #12
đź’–Karen Monicađź’–


Friday, 21 July 2017

In The Purple Mood

Hello My Dear Craft Lovers,

I am in the purple mood today after looking at a beautiful purple patterned paper, I said to myself "I must find at least half an hour to craft".

Handmade Purple Birthday Card


Glad that I am not so busy this morning, so had some time to sit at my craft table and craft away. Ended up sitting at my craft table for more than an hour and made two simple square cards. The other card is not purple though. I decided to make another red, white and blue card which I will share with you in my next post.

In the Purple Mood

Besides pink, my second favourite colour is purple. Any shade of purple will definitely soothe my eyes. Even if I am having a crafter block day...Pink and Purple will definitely break that block away. What's your favourite colour that somehow never let you down?

For this birthday card, I used a white card as base and layered it with a purple cardstock. Then I layered that with the lovely pattern paper that I bought sometime back but almost forgot about it. Using the same purple cardstock, I cut a smaller square to higlight my white birthday die cut sentiment.

puple paper flowers

Then I stamped and hand cut some flowers in three different sizes. Two shades each, a dark purple and a lighter coloured shade. I then layered the flowers to get a lovely double petal kind of shade.

And finally added some embelishment for the center of the flower and at the corner of the card

Well there you go my handmade purple Birthday card with my chosen theme In The Purple Mood for anyone that loves purple.

CRAFT CHALLENGES

Love To Craft Challenge Blog - Challenge #99
The Paper Nest Dolls - Challenge #06 July
Create & Inspire - Challenge #64
Crafting With An Attitude - Challenge #29
A Perfect Time To Craft - Challenge #07
Crafting From The Heart - Challenge #168
Pammie's Inky Pinkies - Challenge #1729
đź’–Karen Monicađź’–


Monday, 17 July 2017

When A Butterfly Sees Flowers

Good afternoon craft lovers. When A Butterfly Sees Flowers, that's the name of my latest handmade birthday card. Actually I made this card sometime last week, but only today I have some free time to post it here.

Happy Birthday Handmade Card


When Butterfly Sees Flowers

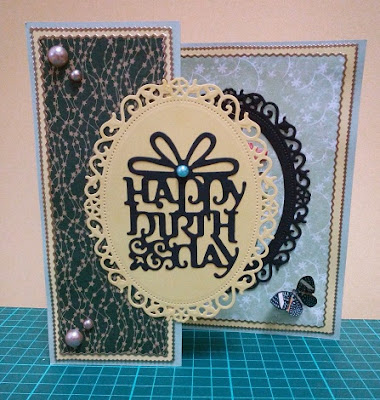
I used a light green card as base and layered it with a yellow card. But somehow in the photo, my yellow card look more like gold card. For the final layer, I decided to used two different shades of patterned paper. For the front, I used a black background with tiny gold stars pattern paper while for the back or should I say inside of the card, I used a green and white patterned paper.

Yellow and green handmade birthday card


I die cut two border patterned oval shapes (one yellow and one black) same sizes and glued it to the front and centre. For the front part, I used the oval shape card as the background of my sentiment. While for the black oval shape, I used it as a frame for my decoupage flower. It has been sometime since I used a decoupage image in my card. Maybe I should do it more often.

For the final touch, I added some pearls and a die cut butterfly. Oh yes...and some gold border stickers too.

Decoupage Flowers


During the weekend I managed to find some lovely coloured cards. My flower box is also becoming empty, so I need to start stamping and die cutting or maybe hand cutting some flowers and leaves. For those of you who are familiar with my Craft With Love blog, will definitely know by now that I just love floral theme projects.

Special Fold Birthday Card


Looking forward to completing more projects this week, hopefully. Until then, Craft With Love

CRAFT CHALLENGES

Scrapping4Fun - Challenge #94 (birthday)
Through The Craft Room Door - Anything Goes (Sheepski Designs)
Simply Papercraft - Challenge #48
Making Memories Crafting - Challenge #7
Craftyhazelnut's Pattern Paper - July Challenge
Lil Patch Crafty Friends - Challenge # 62
The Corrosive Challenge - Challenge #7

đź’–Karen Monicađź’–

Friday, 14 July 2017

Just For You In Pink

Hello craft lovers. Just For You In Pink is a handmade card that is most suitable for pink lovers. This handmade girls card has a very sweet pink shade. And its suitable for any occasion, be it birthday, anniversary or just to tell someone how special they are.

Just For You In Pink

Just For You In Pink

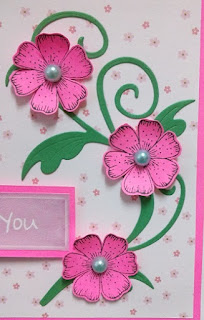
I used a plain white card as base card and layered it with a pink card. Once again this is a 5.5" x 5.5" card. For the final layer, I used a light pink floral pattern paper. This pattern paper has very tiny flowers so it suits the simple and clean concept of my theme for this card.

Handmade Pink Birthday Card

I then die cut a green leafy spiral and stamped and hand cut 4 flowers from the balance pink card. For the sentiment, this time I just print a simple 'For You' greeting in very light purple shade and layered it with the pink card (again using the balance pink card which I layered to the base card earlier.

I used a very light blue pearl for the center of my 3 hand cut flowers which I then glued to the green leafy spiral. And I added a pink pearl at the top corner just for the added finishing touch.

Pink Handmade Birthday Card For Girls

It took me less than an hour to complete this card and I just love its simple and pinkish looks.

Until my next update... Craft With Love

CRAFT CHALLENGES

Create And Inspire - Challenge #64
Crafting With An Attitude - Challenge #29
Crafty Creations - Challenge #345
Pammie's Inky Pinkies - Challenge #1728
Creative Fingers - Challenge #134
Craftyhazelnut's Patterned Paper - July Challenge
Digi Choosday - Week 28 (Anything Goes)


đź’–Karen Monicađź’–

Red White And Blue Birthday Card

Good morning craft lovers. I made a Red White And Blue Birthday Card yesterday. Three colours that I never dreamed of combining in one project but it turned out to be quite an interesting match and might use this three colors again in future projects.

Red White And Blue Birthday Card

What I like about this 3 colors is that this card is suitable for both a lass and a lad. Well maybe if you are making for a lad, you might not want to put flower instead put something more manly for example a picture of tools or something to do with sports.

Red White And Blue Birthday Card

This time I made a 5.5" x 5.5" card. I usually prefer square cards compared to rectangular ones. I choose blue as the base and used the same blue card for the flowers which I stamped and then hand cut them. I then layer the blue base card with a white card 5" x 5" card and a 4.5" x 4.5" red card. I then die cut the birthday sentiment using the same red card with my Spellbinders Sapphire. And for the back of the sentiment I die cut the balance of white card.

Handmade Birthday Card


So to complete this project, I only used 3 cards and just mix and match to make the card look presentable. And finally for the added finishing touch, I used light blue pearls for the two corners and also the sentiment and red embellishment for the center of the stamped flowers.

Red Birthday Card


Beside my Red White And Blue Birthday Card, I made another 3 other cards that I will share with you later. Until then do always Craft With Love. 

CRAFT CHALLENGES

Crafting From The Heart - Challenge #167
Creatalicious Challenges - Challenge #118 (Red White And Blue)
Crafts Galore Challenge - Challenge #43 (Oddball Art)
A Perfect Time To Craft - Challenge #07
Crafting by Designs - July Anything Goes
Di's Digi Design - Layer It Up
Glitter N Sparkle - Challenge #247 (Red White And Blue)

đź’–Karen Monicađź’–


Thursday, 6 July 2017

Black And White Of The Day

Today I decided to go with a monochrome theme and made a black and white birthday card. Two colours that I have never combined before. Usually I only used either a white or black card (as base) never both.

But there is always a first time to everything right. At the starting of the project I was quite unsure, feeling that the card will turned out to be dull and boring. Almost switch to another colour.


Black Anda White Handmade Card


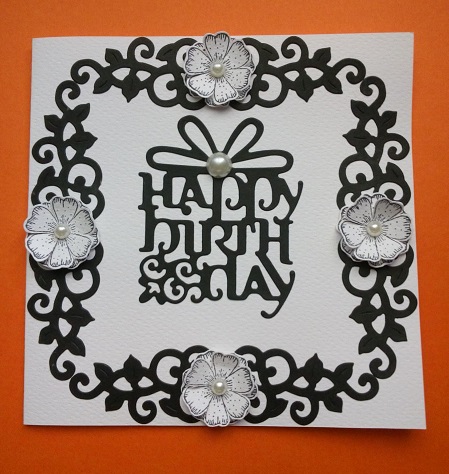
But my fingers kept on going. I used the white cardstock as the base. Then I die cut 4 black leafy spirals using my Spellbinders Sapphire and join them up to form a square. Then I stamped some flowers with black ink and this time I hand cut them. I glued the flowers at the middle of each leafy spirals. Then glued white pearl at the center of each flower.

For the sentiment, again I die cut a Happy Birthday greeting and added a white pearl at the top for the added touch.

Monochrome Handmade Card


At the end of my 'monochrome project' I can't deny that I am actually surprised that it turned out not as how I imagined it at first. It doesn't look dull and boring after all.

Since it turned out to be a successful project, I definitely will try making more monochrome cards in future.

Until my next post....always Craft With Love

CRAFT CHALLENGES

613 Avenue Create - Challenge #199
Crafting By Designs - July Anything Goes
Lemon Shortbread - Challenge #45
Crafty Calendar - July Challenge Anything Goes
Lil Patch Crafty Friends - Challenge #61
Little Miss Muffet - Challenge #166
Catch The Bug - Anything Goes
The Ribbon Girl - July Card Challenge

đź’–Karen Monicađź’–


Monday, 3 July 2017

Handmade Paper Baskets For Doorgifts

Happy July Craft Lovers.

Where have the 6 months gone... I wonder. Its already July and I need to start making Christmas cards or else I will end up buying ready made cards like last year. Will start red and green cards shopping soon. Or maybe a purple and pink theme for this year's Christmas. Something different for a change.

Handmade Paper Baskets


I have not updated Craft With Love for a few days. Been busy for the closing of June. Had to sort our some stuff so that everything will be in order. That's done for now so I can focus on blogging and crafting. My two most favourite hobbies.

Doogifts paper baskets


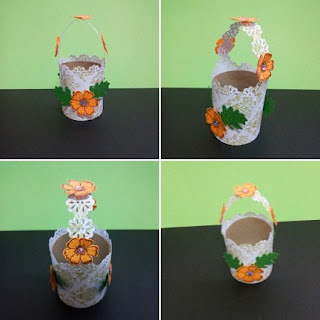
I spend a couple of hours in my craft room today and come out with some miniature baskets. It was very easy to make and I enjoyed myself. Wanted to make just one but ended up making 4. These mini or little cute baskets, whatever you want to call them are suitable for doorgifts at birthday parties or weddings. You can fill it up with sweets or chocolates or even bubblegum. Can even put cookies in it to give to guests at festivals.

cute paper baskets


I used a DoCrafts Flower Doily Punch to make the handle and also for the border of the basket.I stamp and die cut all the flowers and leaves with whatever balance cardstock that I had.

Flower paper baskets


What do you think about my Handmade Paper Baskets?

Miniature Paper Baskets


Always Craft With Love and don't forget to smile while you are at it.

Handmade doogifts for wedding


CRAFT CHALLENGES

Love To Craft Challenge - Challenge #12 (Anything Goes)
Brown Sugar Challenge Blog - Challenge #257
Love To Scrap Challenge - Challenge #99
Colour Crazy Craft Challenge - Week #26
Digi Choosday Crafting - Week #26
Crafty Sentiments Design - Anything Goes
Morgan's Artworld -  Challenge #13

đź’–Karen Monicađź’–

Wednesday, 28 June 2017

Purple And Pink Make My Day

Good Morning Craft Lovers,

I seem to have loads of orange coloured cards. Orange theme has never been on my favourite list, so they tend to be left out. Yesterday I had some free time so I decided to make a birthday card to fill in my card tin. I took out three different shades of orange coloured card from my cardstock and started designing in my mind. But I don't know why, whenever I see a non favourable colour card, my mind just go blank.

Pink Handmade Birthday Card


Didn't want to waste the precious time I had for crafting, I then took a pink patterned card and a purple card and presto all ideas started flooding in. My two favourite colours, have never let me down.

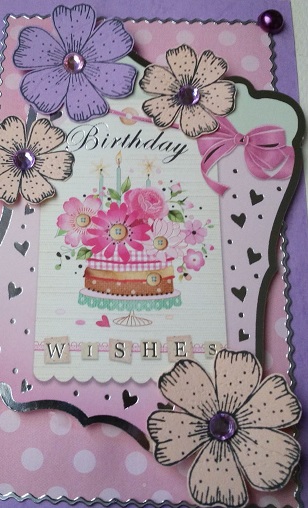
It took me just a few minutes to complete the card. No colouring involve, just cutting and gluing so it was easy peasy. First I used a very light cream coloured card for base. Then I layered it with a purple card and two different shades of pink patterned card. The one with a birthday wish on it, is a free gift from one of my old craft magazine. Can't remember which magazine though.

Flower Handmade Birthday Card


To make this birthday card look more attractive, I decided to stamp some pink and purple flowers and added some silver border stickers. Also some pearls to give that extra added touch.

Until my next project... Craft With Love

CRAFT CHALLENGES

Polkadoodles Crafting - Week #24
A Snowflakes Promise - Challenge #41
Colour Crazy Craft Challenge - Week 25
Crafty Sentiments Design - Anything Goes
Atlantic Hearts Sketch - Sketch 218
Digi Choosday - Week 26
Through The Craft Room Door - June 27 - July 3
đź’–Karen Monicađź’–

Friday, 23 June 2017

Purple Full Bloom

Hello Craft Lovers,

What are your plans for the weekend? I got another 2 cards to make so hopefully I can get it done over the weekend. I seem to be addicted to digi stamps and colouring for this week. If you notice my two previous projects were about digi stamps and colouring.

Handmade card purple flowers

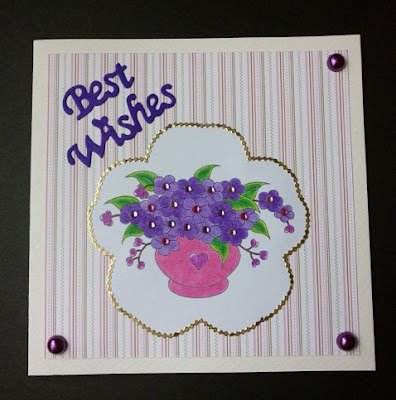
In this post, I want to share with you a card I made today using another digi stamp from Miss Daisy Stamps. It' s called Full Bloom 2. I just love colouring flowers, so this digi stamp is one of my favourite.

digital stamps colouring


For this card, I decided to go with two of my most favourite colours... Pink and Purple. I used a light cream card for base and layered it with a 5" x 5" patterned cardstock. And as always I used my Spellbinders Sapphire to die cut the Best Wishes sentiment using a piece of purple card to match with the full bloom colour.  And also added some pearls for the corners.

I better start getting busy with my next card. Until then don't forget to Craft Wih Love

CRAFT CHALLENGES

Aud Sentiments - Challenge #182
Crafting With An Attitude - Challenge #28
Morgan's Artworld - Challenge #12
Crea Chicky - Challenge #11
Eclectic Ellapu - A touch of pink and /or purple
đź’–Karen Monicađź’–

Saturday, 17 June 2017

A Special Fold For Raya

Hello Craft Lovers,

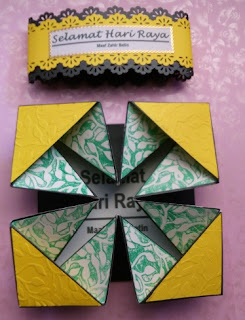
I am back again to share with you the special card fold that I made. Again its for Hari Raya or Eid al-Fitr. This is the second time I am making this card fold. What I like about this fold, is that it reminds me of one of my childhood games.

Pretty Card Fold

This card fold needs some extra measuring and I have my Ultimate Crafter's Companion board to thank for to get the right scoring and that makes it so much easier to fold. I also added some embossing and stamping with embossing folder to make this card fold unique. It took me some time to complete, with all the added touch included but I am satisfied with the completed project.

Stamping on embossing folder


Instead of cream or white, this time I used a black card as the base card to highlight the yellow and green. Only at the center I used a piece of pattern paper to give a little pattern border for my sentiment.

Different card fold


Sorry I am in a rush at the moment, so can't include any tutorials for this card fold. But will share a tutorial in future posts.

Hari Raya Card Fold

The sky has gone dark, I better go and take the laundry in. Until then Craft With Love.

CRAFT CHALLENGES

613 Avenue Create - Challenge #198
Moving Along With The Times - Challenge #47
Scrapping4Fun - Challenge #92
Creative Knockouts - Challenge #198
Incy Wincy Designs - Anything Goes

đź’–Karen Monicađź’–


Green Oh Green

Happy Saturday Craft Lovers,

The weekend is here again. How are all of you craft lover's getting on? What's on your agenda for this week? Any new craft projects?

Handmade Rice Pouch

I don't think so I have any on my mind right now. Just need to share all the cards I have made for the past two days. Above is the second Raya card that I made. Again the concept is the same as the first Raya card that I shared yesterday in Let's Go Green.  But for this second card, I didn't used any light green card. Instead I added more red to it, to add to the celebration mood.

Stamp Flowers

For my next post I will share a different card fold. Until then, don't forget to Craft With Love.

Handmade Hari Raya Card


CRAFT CHALLENGES

Atlantic Hearts Sketch - Sketch #216
Crafty Creations Challenge - Challenge  #343
Create And Makes - Challenge #12
Brown Sugar Challenge - Challenge #255
Creative Finger's Challenge - Challenge #132

đź’–Karen Monicađź’–

Friday, 16 June 2017

Let's Go Green

Hello Craft Lovers,

Have been busy making cards for the past two days. Made one card for Papa since Father's Day is just a couple of days away and I also made 5 Hari Raya cards for family and friends. Since Raya or Eid al-Fitr as it is known around the world is just a week away, I don't think I can post the cards. It will not reach on time. So have to give it by hand when I meet all of them.

Hari Raya Handmade Cards


For this Raya card above, I used a green card for base. I blend the light green and cream card as a background for my red flowers. I used a doily border punch for the cream coloured card and I embossed the light green card with a leafy embossing folder.

Red Stamp Paper Flowers


The red flowers are stamped and die cut using my Spellbinders Sapphire. The white doily resembles a plate or saucer with two ketupats on it.  The ketupat (a type of rice dumpling) is made from rice, packed inside a diamond shape case/pouch  that is of woven coconut leaf. But I made it out of green and yellow colour paper, definitely without any rice inside.

Paper Ketupat


I better keep this post short and sweet, since I have a few more other cards to share with all of you.

Eid Handmade Cards


Until then, don't forget to Craft With Love


CRAFT CHALLENGES

Crafting From The Heart - Challenge #163
Get Creative Challenge - Challenge #59
Addicted To Stamps And More - Challenge #246
Addicted To Stamps - Challenge #150
Pammie's Inky Pinkies - Challenge # 1724

đź’–Karen Monicađź’–